Wednesday, July 25, 2012

Pineapple Rice pudding


This past week has been a crazy one. My little 4 month old son came down with pneumonia, my husband is still sick, and baby girl now has a fever. Needless to say I haven't had much time to do anything. I even had to miss my moms night out, I was just to exhausted to go! So when Sunday rolled around and my son had his annual pool party for his karate studio I went into panic mode. I had been so wrapped up in everything going on I didn't prepare something in advance for him to bring.  Knowing I didn't have much time and I had to make something I went through the cabinets and looked for anything quick and easy I could make. I had seen a recipe for a pineapple rice pudding when looking up ideas for the moms night out and decided I would make something like. Now I didn't have all the items I needed to make it from scratch but I did some things that I could use to make an instant version. Here's what I used and how I threw it together. Now I didn't have any whipped cream to top it off with so its not that pretty but if you like rice pudding and you like pineapple it sure was yummy! 


Ingredients: 
1 cup pineapple juice ( you can use water if you dont have pineapple juice on hand)
1 cup instant rice.

4 cups milk
2 pkgs instant vanilla pudding
1/2 cup raisins (optional)
1 1/2 tsp cinnamon
1/2 tsp nutmeg
1 tsp vanilla
1 can crushed pineapple drained 

Boil the pineapple juice (or water) add instant rice, cover and prepare according to package (dont add salt) and set aside. 

I a large mixing bowl add the 4 cups milk and the instant pudding mixing until pudding is firm. Fold in raisins, cinnamon, nutmeg, vanilla, pineapple and the cooked rice. Place in the fridge for a few hours and let it cool an set. Serve cold and if you want top it off with a little whipped cream and a dusting if cinnamon sugar.

Doesn't get much easier then that... enjoy! 


Wednesday, July 18, 2012

3 easy steps to hand painting Minnie's Tea Pot


Wow has the last week been super busy. Between trying to catch up on my seriously neglected garden,a few cakes, a couple extra kids for two days, my nieces birthday this week and trying to get into full planning mode for Bella's 2nd birthday I feel a little behind! I did get started on one of my craft projects and hand painted a small tea pot for her party. I think its cute. The small pots are going to be used for decoration but they were also a trial for the larger tea pots if I am able to find some white ones at a reasonable cost. Otherwise we will use a mix of decorated teapots. After I did the first one and realized just how simple and easy you can make a customized pot, I figured I would document the second one using a different pattern for all of you here. So here is what I did.. super easy and simple....

 First you will need to pick up a few supplies.

For this project I just have a small white tea pot, ceramic water based non toxic paint (you can get this at wal-mart or any crafting store), cotton balls ( you might even want q tips for fixing mistakes) and paint brush.


Step one: wipe of the surface with rubbing alcohol. Make sure you do not skip this step because any fingerprint or sticky residue from a price tag will be there permanently once you paint.


Step two: paint your design. I free handed mine but you can also use a stencil. 
QUICK TIP: if you make a mistake use the q tip and some rubbing alcohol to remove the unwanted paint. 


Step three: Place the painted ceramic item in the oven at 350 degrees and bake for 30 minutes and allow to 
cool. 


And there you have it supper easy. Now I just have to do this on some more tea pots, 36 cups and 
saucers! Easy right?


Friday, July 13, 2012

The evolution of a Skyrim Cake

As I sit here waiting for a cake to finish baking and wishing I was at Comic Con back home, I figured I would feature the Skyrim launch cake. This cake came about as a big I'M SORRY to a friend of ours Allen. For 2 years my sister in law and I promised Allen we would make him a birthday cake and for 2 years he went with out for one reason or another. So this past year we were not about forget him and this cake had to be epic! As it turned out right around his birthday the GameStop store Allen works at was going to be having a huge midnight launch party for the game Skyrim. So the idea was hatched to make a Skyrim cake for Allen and if he wanted he could take it to the launch party. I took way to many pictures of the process because so many people ask us how we do things I figured it was a good cake to have a photo book from start to finish.... so enjoy 

I forgot to take a picture of his rice cake base but here is Skeletor with his fondant covering 
(yes we named each head as we were making them)

This is the carved base for Orc boy


 covered in fondant

Here is Normans carved rice crispy face


covered in fondant


Here are all three side by side ready for details and painting. 


My sister in law work on Norman... this was her first big fondant detail job
She was too funny worrying about how he looked. In the end she did a great job.


sill working out all the details


Here is Norman fully painted and read to go


Nex onto Orc boy. I worked on him and I think I took a ton of pictures because the camera was right next to me and he had the most detail work.


Strated his head detail with ropes just like his nose 


here they are once I finished the detail


Now I added lips and teeth


Now he is ready to pain


here he is after I added his mowhawk and paint job


side view


My mother in law did skeletor here he is all finished. 


 now we started to add them to the base


next we started on the hatching dragon egg


My mother in law did an awesome job painting and working out the details 


here i am making the dragon hand 


once we added the dragon egg we threw on some hand painted silver and gold fondant coins and blood


Here is the finished cake


Here is the cake at his launch party


Here is Allen with his cake. I hope the two years he waited was worth it!


And this is how we went from a batch of cake and rice crispies to an orcs head on a sword...happy gaming! 


Thursday, July 12, 2012

Say cheese....crochet lens buddies

To say I live with a camera in my hand isn't much of an exaggeration. I love pictures and I love to capture images of everything thing but mostly my kids. There isn't much talent behind my pictures, every now and then I get lucky but for the most part its your standard mom took that photo kind of picture. Now if your kids are anything like mine getting them to look at the camera and smile isnt so easy! I have one child in particular who's favorite thing to do when you pull out the camera is look at the floor and say "Cheese" no matter how many times you say look at the camera , look up, can you see my eyes he never looks at me! So I was talking to Monique of Avery Grace Photography and she showed me a picture of a lens friend made of felt and what looks like an old school scrunchy. She also showed me a crochet version of one and said you could make one of these right? She was right I so could make them. So I set off to try and make a few different versions. Its amazing how well they work. Gives the little ones something to look at. adding a squeaker to some is just an added bonus. So here is what the finished lens buddies look like

This is Mr. Frog he was my first of the lens buddies He has a squeaker behind his right eye.


Next for myself I had to make an Owl

After the Owl I had a request to make one in red

Then came the request for a ladybug. She has a squeaker

Next I made a Lion because my 3 month old is completely in love with his Simba blankets.


Wednesday, July 11, 2012

The tale of a Drunk Cupcake


So whats a girl to do after a morning with 5 kids, (4 of which are under the age of 5) an afternoon working in her severely neglected garden, and a night at zumba????? Reach for the liquor!


 Now I've always been a huge fan of Malibu and pineapple juice until this past summer when my big sister Lonise came out for a visit. While sitting out on the back porch enjoying the quite and a drink she tells me that our sister in law Shelley would make a drink just like it but it had something else in in. After a quick call home the whipped cream vodka came into the mix and oh how my life was complete! Since that day it has been my drink of choice. So I reach in the cabinet pull them out and decide not to drink them but to make a cupcake with them. I grab a bunch of ingredients, my notebook and a pen to write it down. We all know I'm really bad about measuring things normally I just throw a bit of this a bit of that in and wing it but with the plan of blogging about this adventure I made sure to pull out the measuring cups and log what I did. This was no easy task for me. I started with the thought of  pineapple upside down cake and went from there. So with that said... here goes nothing


Cake Ingrediants:
2c Flour
1 1/2c sugar
1 1/2 tsp baking powder
1/4 tsp salt
2/3 cup coconut flakes
1c diced pineapple
2 Tbsp Malibu rum
2tsp vanilla
1/2c Pineapple juice
1c sour cream
3 eggs 
Pre heat oven to 350. Mix all your dry ingredients then slowly add in the wet. Spoon into cupcake liners and bake for 25 minutes + or - until the cupcake is cooked through.


Once the are done baking pull them out and place on a cooling rack. While cupcakes are cooling we are going to make a Malibu simple syrup.

1/2 stick butter
2/3 cup packed brown sugar
1/4 cup malibu rum

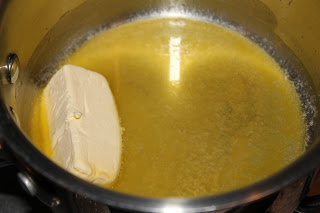
Melt you butter over the stove

Add brown sugar and Malibu

Now let this all cook down int a syrup..

Next you will want to poke a bunch of holes in each cupcake. Be careful not to punch through the liner. This is going to let the Malibu syrup really get into you cake. 

Cover each cupcake with a generous amount of the Malibu syrup and let them sit until the are completely cool be for frosting them.


Now on to the frosting.

4c powdered sugar 
1c crisco
pinch of salt
1tsp vanilla
1 tbsp meringue powder
2 tbsp whipped cream vodka
2 tbsp pineapple juice + or - to get the consistency you want. 
I threw in 1/2c coconut at the end just to give it a little more flavor but thats up to you. you can add as much or as little as you want.

Once they are completely cool frost each cupcake and garnish them how ever you like or leave them as is. I chose to garnish with a piece of pineapple because well there is never enough pineapple! 


So why a drunk cupcake?? I figured this was a good trial for my moms night out and it was a safe use of the liquor for me. This way I dont go crazy and throw out all the calorie burning I did tonight. I say safe because, and I know this may sound weird, I hate cake. Just not my thing but I sure do love to make them!! I did have a few taste testers try them out and so far so good.. so try them out and let me now what you think!