Monday, July 9, 2012

Look whoooo's One Party Theme.


Who doesnt love to plan a party??? Picking a Theme is the hardest part. Some years the theme is just obvious and other years we struggle. As I start to toss around ideas for Miss Belle's 2nd birthday I figured I would take a look back at her first birthday. 
Now when the child is turning one more often then not you have full control over the theme. Now thats not always the case but with Bella, that was exactly my luck. I tossed around a few ideas but I kept coming back to one... OWL's. I started looking around and I found that Birthday express had a cute "Look Whoo's one" themed set. I was sold.  
Now let the creativity begin. I started with the pre made item from Birthday Express. I ordered the typical napkins, plates and they had cute little tumblers that I had to pick up as well. Throw in a few balloons and hit the check out button. Next I just had to crochet her a hat that matched her theme. I found a super cute pattern on a blog and had to try it out. Although I did make some alterations to the pattern you can find the original Pattern on daisy cottage designs if you want to give it a try. 

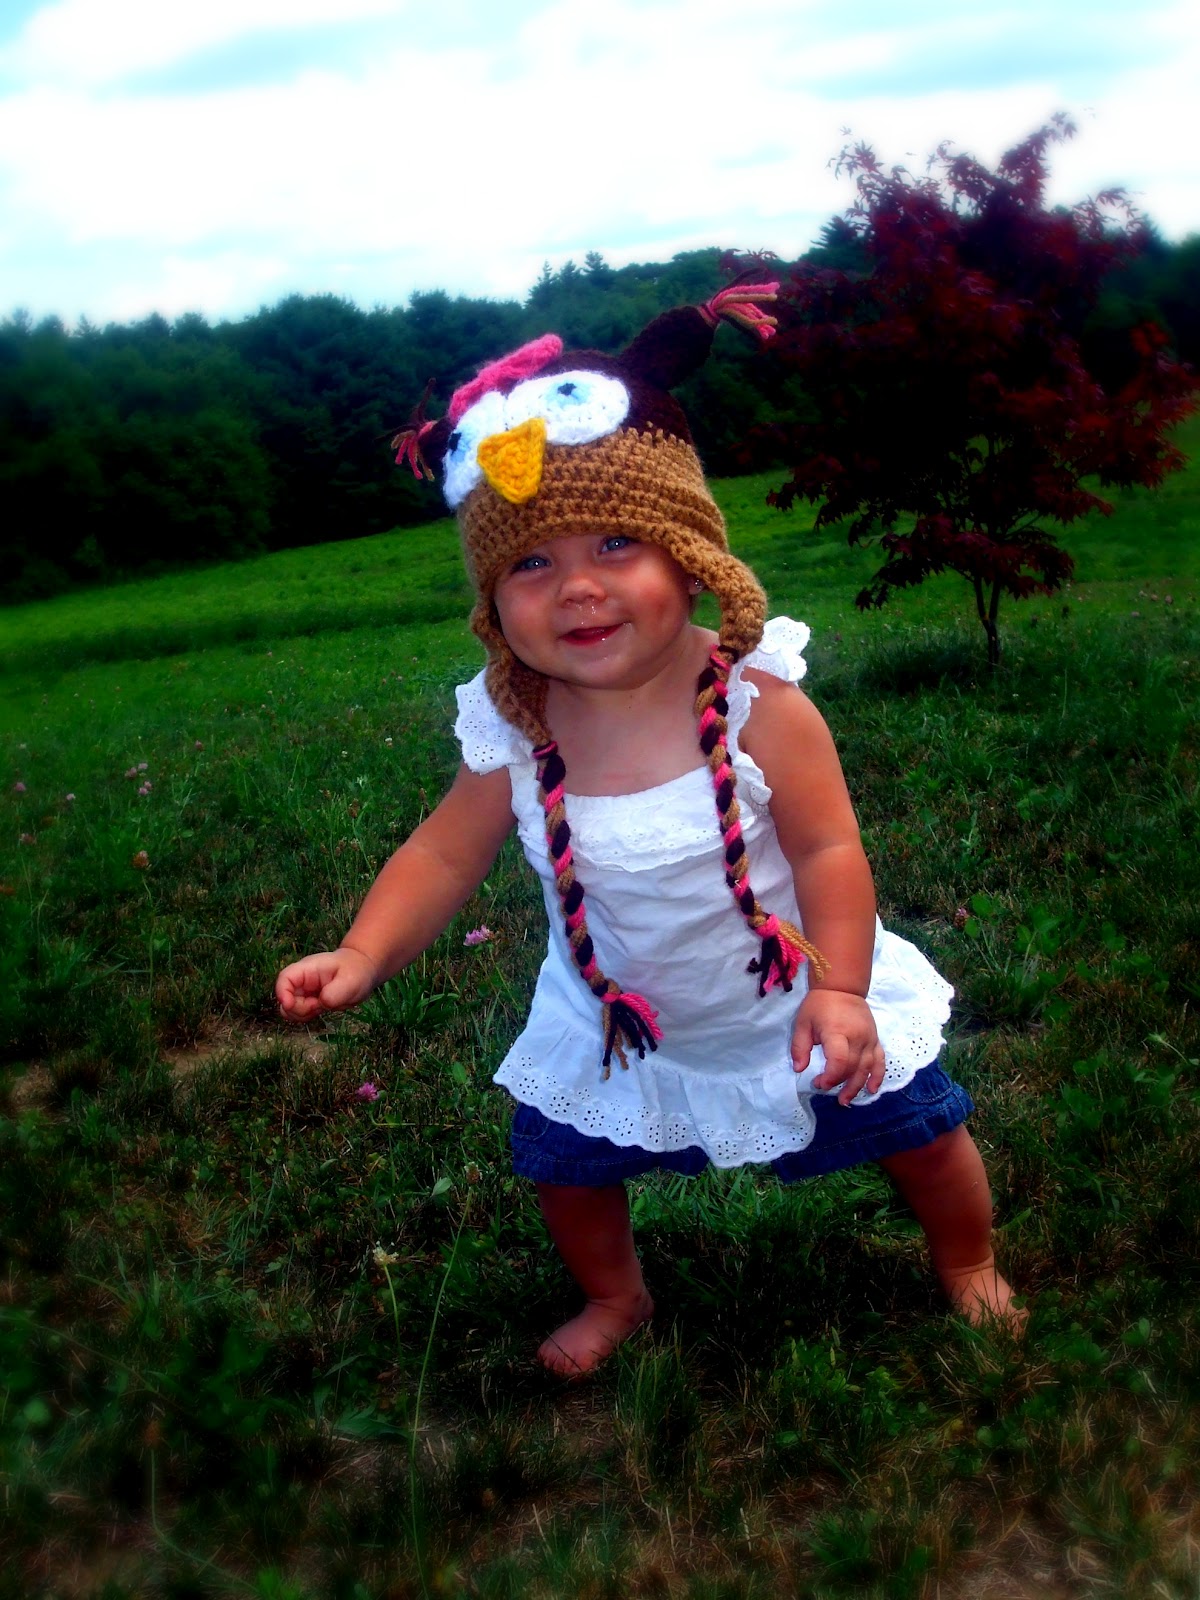
Here is what my finished hat looked like.


With the hat complete I threw it on my daughter and took a few snap shots of her in the back yard and started to design her invite. I wanted that as the main picture but I also wanted her picture from us leaving the hospital one in a tutu dress we made her and one from a family photo session with Avery Grace Photography. That did not work out so well. Thankfully I have amazingly talented friends. My friend Erika (who is 3000 miles away) jumped in and offered to put one together for me. All I had to do was send her the party info and the pictures . Now if that wasn't awesome enough she had just given birth to a beautiful baby girl yet she had the time to do this for me, I couldn't have been more grateful.

Here was the amazing invite she made that was the perfect match to our theme. 


Now I printed them on on the computer on 5X7 photo paper and off it went in the mail.

Next on the planning list was her one year cake smash and portrait session with the AMAZING Avery Grace Photography out of Dayville CT. Now anyone who knows me know I have become a little obsessed with her work and I book a session when ever I can. Any excuse for pictures done by her and I'm there.  If you are local you have to check her out!!! 
So with my photo session booked I needed an out fit. I made a tutu easy enough but the shirt was another store. I got to looking around and I found one in the Etsy shop AllRibbonedOut that had an owl that matched the theme perfectly. Only problem was it had the kids name on it and I didn't want one with her name on it. So I emailed the shop owner and she was able to make me a custom shirt with my theme "Look whoo's One" in place of her name. It was perfect!  So I baked and decorated a giant cupcake and off we went. Here are a few of my favorite Pictures from the photo shoot. 
The fun inside owl themed set up

Next we moved out side to snap a few pictures and make a huge mess 


Here is the picture she took of the cake I made                      

Let the smashing begin 


So proud of the mess she made 

I was hand washing that Tutu I made for days trying to get all the cake out so she could wear it again on her birthday. Boy did she do a good job of hiding it in there! 

With that all done it was time to work out a few details. I made some water bottle labels and thank you tags. Last I had to design and make her cake with the help of my mother in law and sister in law. I didn't go too crazy with this party seeing as how she was just turning one and I was still in the throws of morning sickness but it was an amazing day and tons of fun.  Here are a few snap shots of the party itself. 

Here is her cake and smash cake set up on the table

water bottles with the lables I designed. I alternated them showing the front and the back. The thank you cards read:  Thanks for making my 1st birthday a real HOOT Love Isabella. 


 The tumbler party favors for each of the kids


Napkin wraps


We started the party in the tutu


But had to lose the tutu so we could bounce


Getting ready for cake


Her super cure Owl clip also from the same Etsy shop I got her shirt


Bella with her cake before we cut it and served it to the guest


She wasn't sure what to make of the candle and the singing


 Happy Birthday Miss Belle's 


Sunday, July 8, 2012

BBQ Smores...can we just say yummy!


We all have that one friend that makes us look like epic failures as a party host. You know the one who always has even the simplest BBQ full of fun crafty kids activities. Even a  moms night in to watch the Oscars comes complete with a candle lit red carpet as you walk up to the house, signs everywhere, a photo op, food galore and a table covered with wigs and jewelry so you can bling up your outfit... yes you know what I'm talking about. For me that's my friend Carin. She is my go to girl for any and all party fun that's for sure. So over the holiday week we went to her house for a kids play date/ BBQ and she comes out with theses BBQ Smores for the kids. Can we just say Genuis. 
 So what is a BBQ smore? Its a waffle cone filled with gooey goodness wrapped in tin foil that you throw on the grill to melt. When Carin made her smores she mixed Chocolate chips, mini marshmallows, banana and strawberries together. I happen to be allergic to bananas so I didn't get to try them but the kids couldn't get enough and they looked delicious. Of course I had to steal the idea and try it out with all the kids at the camp ground this weekend. So off to the store I went to pick up some supplies. Here is what I got....
 A box of waffle cones
Mini marshmallows
Semi sweet chocolate chips
Peanut butter chips
Strawberries 
Blueberries


Next add all your ingredients in a bowl and mix together


Stuff each waffle cone and place on a piece of foil


Now wrap them up and throw them on the grill. Be sure you do it over low heat and give it time to melt. If its to high you will burn the waffle cones.


Once they have melted together unwrap them and ta duh..... we have BBQ Smores. Just look at all the melted goodness....YUM! 


Now at the camp ground I let all the older kids make there own cones how ever they wanted. We just threw the supplies out on the table and let them dig in. This way each one was perfect for each child. 

Here are a few snap shots of the kids making and enjoying their cones


Now feel free to use what ever you want in your smores and be creative. You  can throw in toffee bits or nuts (it really doesn't matter) just be sure to have fun, make them your own and enjoy!!! 


Tuesday, July 3, 2012

Bring on the exploding cake.....


Happy 4th of July! Ok so I know its only the 3rd but who's really counting right? Growing up a semi military brat the 4th of July was always something special to me. I say simi because my father was actually retired after 23 years of service before I was born so I wasn't shuffled around here or there I just grew up with a respect for our country and those who sacrifice every day for us.
As a child I was lucky to live right up the hill from where the town  fireworks were done so we never had to trek out anywhere home was the prefect location. Friends and family would hang out in the back yard with the grill working overtime a cold drink in hand and the hope of cooling off from that California heat! It was just always a laid back day of friends, food and fun.  When the sun would start to set we would grab a ladder, a few drinks, some snacks and climb onto the roof of the house to watch the show.  I cant even remember when the tradition started of sitting on the roof but it was something I always looked forward to doing and its something I miss every year now that I'm on the east coast! Although I miss the west coast and the family... here on the east coast we can actually buy fireworks and play with them!!! So in honor of the fourth of July today I thought I would share and feature my 4th of July cake from last year. What an adventure that was.
We were going to be attending a good friends bbq and I asked if I could bring anything. Of course she being the epic host said no we have everything just come and have fun. Well that's no fun so I ask if I can at least bring a cake as a surprise for the kids. She agreed and the wheels started turning. What to make what to make. So later that week I'm in Lowes trolling the aisles walking through plumbing and I see the PVC pipes... light goes off.. I need to add working fireworks to this cake. It is the 4th of july after all. So I snag a few pipes and head to the check out. The guy at the counter says to me.. looks like some one is doing some plumbing. I laugh and say nope I'm making a cake and putting fireworks in it. Total shock on his face.. nope didn't see that one coming now did ya??? I get home and my husband asks me what I have so I tell him my plan. He just looks at me, shakes his head and says " this is why you are not allowed to go into the hardware store alone. The ideas you come up with." Oh if he wasn't right. So I go about cutting my board for the base and baking my cake. I frost and crumb coat the cake and walk away to let it dry for a little while.... big mistake! Enter my 3 year old at the time.. Mommy I sweeping the kitchen and before I could even blink the handle of the broom hits the cake and all my hard work is sitting on the floor. I could have cried, it's 5pm the night before and I'm at square one. I was not about to disappoint the kids even though they had no idea it was coming I had to make it. So as quick as I can I whip up 4 more cakes and pray I get it all done in time. Just after midnight my husband comes down into the basement wondering why the band saw was on.  Yep that was me working cutting the pvc pipes and working on structure for the fireworks. At that point he knew I wasnt going to bed any time soon. So after a late night and a busy morning I had a cake. It wasn't exactly what I had planned and far from perfect but for less then 24 hours its was a pretty great cake! 
The kids loved it. Who am I kidding the adults loved it too. All and all I was pretty excited it worked out and after a show there was still a cake for everyone to enjoy! 


Avery inspecting my work :0)


 All the kids with the cake before we light it up. Yes I said all the kids because we all know the guys are nothing but over grown kids when fireworks come into the picture!


My husband got talked into doing the honors of lighting the fireworks. Maybe one day I'll learn how to set one up to electronically go off  :0) 


Happy Independence day! 


Sunday, July 1, 2012

Crochet Sandal tutorial

To kick off my new blog, I've decided to share a pattern for a pair of new born crocheted sandals I made yesterday. As a stay at home mother of four I hate nothing more then finding a pattern I like but you have to pay for it. Mostly because more often then not I cant spare the few dollars so I end up going with out or driving my self mad trying to recreate it on my own. Also because I am a self taught crocheter, I'm never sure if I'm going to understand the pattern with out reading it first. Maybe that is partly due to my dyslexia but patterns can be really hard for me to read. So to spare you all the frustration this one is FREE! Yes please feel free to sell any items you make using my pattern but you MAY NOT sell the pattern itself as is or with minor alterations. If you do sell the items please give me credit for the pattern and link back to this page. Also you MAY NOT use any of my pictures or AVERY GRACE PHOTOGRAPHY photos as your own with out written consent from myself or AVERY GRACE PHOTOGRAPHY. This actually writing a pattern down is a first for me, so I hope you can understand it. My biggest problem is when I crochet I tend to pick up a hook and start playing around crocheting and tearing apart my work over and over again until I am able to make what it is I have in my head. At this point half the time I have no clue how I actually made the finished product. I tried my best to log this pattern as I went along and I was sure to take lots of pictures. Well with that said, here goes nothing........


I used a G/ 3.25 hook for this pattern. Sole should be 4 inches toe to heal once completed.


Crochet Terms 
ch = chain
sc = single crochet
hdc = half double crochet\
slst = slip stich
fpsc = front post single crochet
st(s) = stiches


R1:    Ch 15. Sc in the third st from hook. sc in the next 8 st. 5hdc in last st (from here on out you will be working in a round until the sole is complete) sc in next 8 st 3sc in end


R2:   sc in next 8 st, hdc, 2 hdc in next st, hdc, 2hdc in next st, hdc, 2 hdc in next st, hdc sc in next 10 st


R3:  sc in next 8 st, hdc in the next 3 st, 2 hdc in next st, hdc, 2hdc in next st, hdc, 2hdc in next st, hdc, 2 hdc in next st, hdc in next 3 st, sc in next 9 st


R4:  sc in each st around (33 st) Slst in next st.  slst in next 5 st. ( When working the opposite shoe turn after the first slst and then slst 5. thus making the slip stiches in the last five st you created not in the next five.. I hope this make since) Ch1 turn at this point the sole should be 4 inches.


R5: hdc in the next 11 st, ch 1 turn


R6: hdc in next 10 st, ch1 turn


R7: hdc in next 10 st, ch1 turn


R8: hdc in next 10 st, ch 15, sc in 6th st from hook, sc in each st (9 )working back to  the ankle of the shoe slst . fasten off and weave in ends.


Now to make the flower. I'm not going to post a ton of pictures until we get to attaching the flower. If you find the flower confusing I can post a tutorial on how to make it step by step. Just let me know if you find it confusing.  This tends to be my go to flower for all my crochet patterns and honestly I'm not even sure at this point where I found the pattern I've been using it for so many years. The thing I love about it is you can add layers take away layers or change up the look by changing the fpsc to bpsc (back post single crochet). ok enough rambling.... on to the flower


Double layer flower


R1: 5 sc in magic ring. slst in first sc and tighten to form circle.


R2: ch2 slst in each st around ( you should have 5 ch 2 spaces) 


R3: ( sc, 4 hdc, sc) in each ch 2 space around. slst in first sc.


R4:  fpsc ch 3 in each post around slst 


R5: ( sc, 5hdc, sc) in each ch 3 space around slst in first sc ( now at this point as i was saying you can add layers. to add to the flower just repeat r4 adding 1 ch to each layer followed by rd 5 adding 1 hdc in the middle of the petal. ie for a third row r6 would be fpsc ch4 around r7 sc,5hdc,sc around)


* at this point I decided to make another 5sc magic ring in the color of my sandal and stitch it into the center of the flower so it was level and the same color if you want it all the same color leave it as is or if you want an center color but don't want it level you can just start your magic ring with one color and change to the flower color at R2 but this was just my preference for the look I wanted not a necessary step* 


Now onto attaching the flower 


R6: fpsc ch2 around slst in first st. the underside of the flower should look like this.


Step7: ch 3 fpsc in 4th st from ankle hdc in each ch, slst in ch2 space


Step 8: ch3 fpsc in 3rd post from last fpsc, hdc in each ch slst in post


Step 9-12: Repeat step 7 and 8 twice for a total of 6 attachments.

Step13: Ch 5 fpsc in bottom corner of the ankel, hdc in each st, slst in center of flower


Step 14: chain 11 slst in fist ch creating a loop.


Step 15: Ch 5 fpsc in bottom corner of the ankel, hdc in each st, slst  fasten off and weave in ends. 


At this point add a button or bobble slide your ankle strap through the loop, button and ta duh... we have a sandal! 


Please let me know what you think or if you have any issues. Until my next entry... happy crocheting!